Thursday, February 23, 2012

DIY Chalkboard


   I haven't made any craft posts recently. It's not because I haven't been crafting....I have...a lot. I've been feverishly working on tons of projects for Ethan's 1st Birthday party next month and I don't want to unveil anything until after the party. I have 7-10 projects I'm working on right now! I'm very excited about Ethan's party and I can't wait to show everyone all of the wonderful things I've been making. But since that is still an entire month away, I scrounged up something to post today.
   A couple of weeks ago, my friend Meghan and I went to the flea mall to find props for Ethan's first birthday photo shoot. I came across this old fireplace screen and thought it would make the perfect chalkboard. Its a great size and I love that it stands up on its own. And, best of all, when Ethan gets a little older it will be perfect for him to doodle on.


   Unfortunately, I forgot to take a picture of my fireplace screen before I painted it. :/ But, it was just solid, bare wood. Nothing special to look at. I spray painted it my favorite antique white. It took about 3 coats. Next I started to tape off the edges so I could paint the center. (This is when I realized I hadn't taken any pictures.)


   After taping  the edges, I took it outside and painted the center with the chalkboard paint. I used Rustoleum chalkboard paint. I've had better luck with the roll-on kind, but I've used the spray kind too.  Next time, I think I'll try to make my own!
   MAKE SURE TO READ THE DIRECTIONS! This is a drawn out process because you have to wait a few hours in between coats and then 3 days before writing on it.


   After my chalkboard was completely dry, I removed the tape and lightly sanded the edges so it would look distressed. I love the look of distressed furniture and it is really nice on projects like this because the wood is already imperfect.


   This is the finished project. I hate that my pictures are so bad, but my phone was the best I had to work with at the time. I'm really excited to draw a HUGE #1 on it and have Ethan next to it in his pictures! One year photo shoot post coming soon!!

Sunday, February 19, 2012

Garlic-Encrusted Baby Back Ribs


  When Brian and I got married in 2009, my parents gave us one of the most awesome gifts I've ever received. They collected tons of yummy recipes, from family and friends, and compiled them into a cookbook for us. It was so thoughtful and creative and it was obvious how much time and effort they had put into typing the recipes, finding pictures to go along with them, and arranging them by category into a lovely book. It contains some of my favorite recipes I grew up enjoying and lots of new ones begging to be tried. Three years later, I still use my cookbook regularly. It is, by far, my favorite cookbook I own. Not only because it is sentimental, but because it contains so many wonderful recipes.
   Both of these recipes came straight from my Daddy's kitchen. That's how I knew they would be so delicious. My Dad is the best cook I know and I credit him for my prowess in the kitchen. The ribs are sweet and garlicky and the best part is they are prepared in the oven! I love that I can cook finger-licking good ribs without having to fire up the grill. These ribs are easy to throw together and the oven does all of the work. The baby blue salad is the perfect accompaniment for the ribs. It's fresh and simple and together they make the perfect light meal.


Garlic-Encrusted Baby Back Ribs

1/4 cup olive oil
10 cloves garlic, minced
3 sprigs rosemary, coarsely chopped
2 tsp sugar
2 Tbsp white wine vinegar
1 tsp salt
1 tsp freshly ground pepper
4 lbs baby back pork ribs
1/2 cup BBQ sauce

In a bowl, combine first 7 ingredients.
Place ribs in a shallow baking dish and pierce meat all over to allow the marinade to penetrate. Rub the marinade into the meat with your hands until ribs are entirely coated with garlic and herbs. Cover and refrigerate for several hours or overnight.
Preheat oven to 275 degrees. Transfer ribs to a baking dish large enough to hold ribs in one layer. Reserve marinade. Brush both sides of ribs with BBQ sauce and arrange, meat side up, in dish. Roast on middle rack for 2 1/2 hours or until meat is cooked and tender, basting occasionally with reserved marinade.
Increase temperature to 500 degrees. Bake another 15 minutes, until edges are crispy. Remove from oven, cut into sections, and serve.


Baby Blue Salad

1 bag spring mix lettuce
bleu cheese, crumbled
Mandarin orange slices
strawberries, quartered
walnuts
balsamic vinaigrette

Toss lettuce mix with balsamic vinaigrette and bleu cheese. Top with oranges, strawberries, and walnuts.


Enjoy!

Wednesday, February 15, 2012

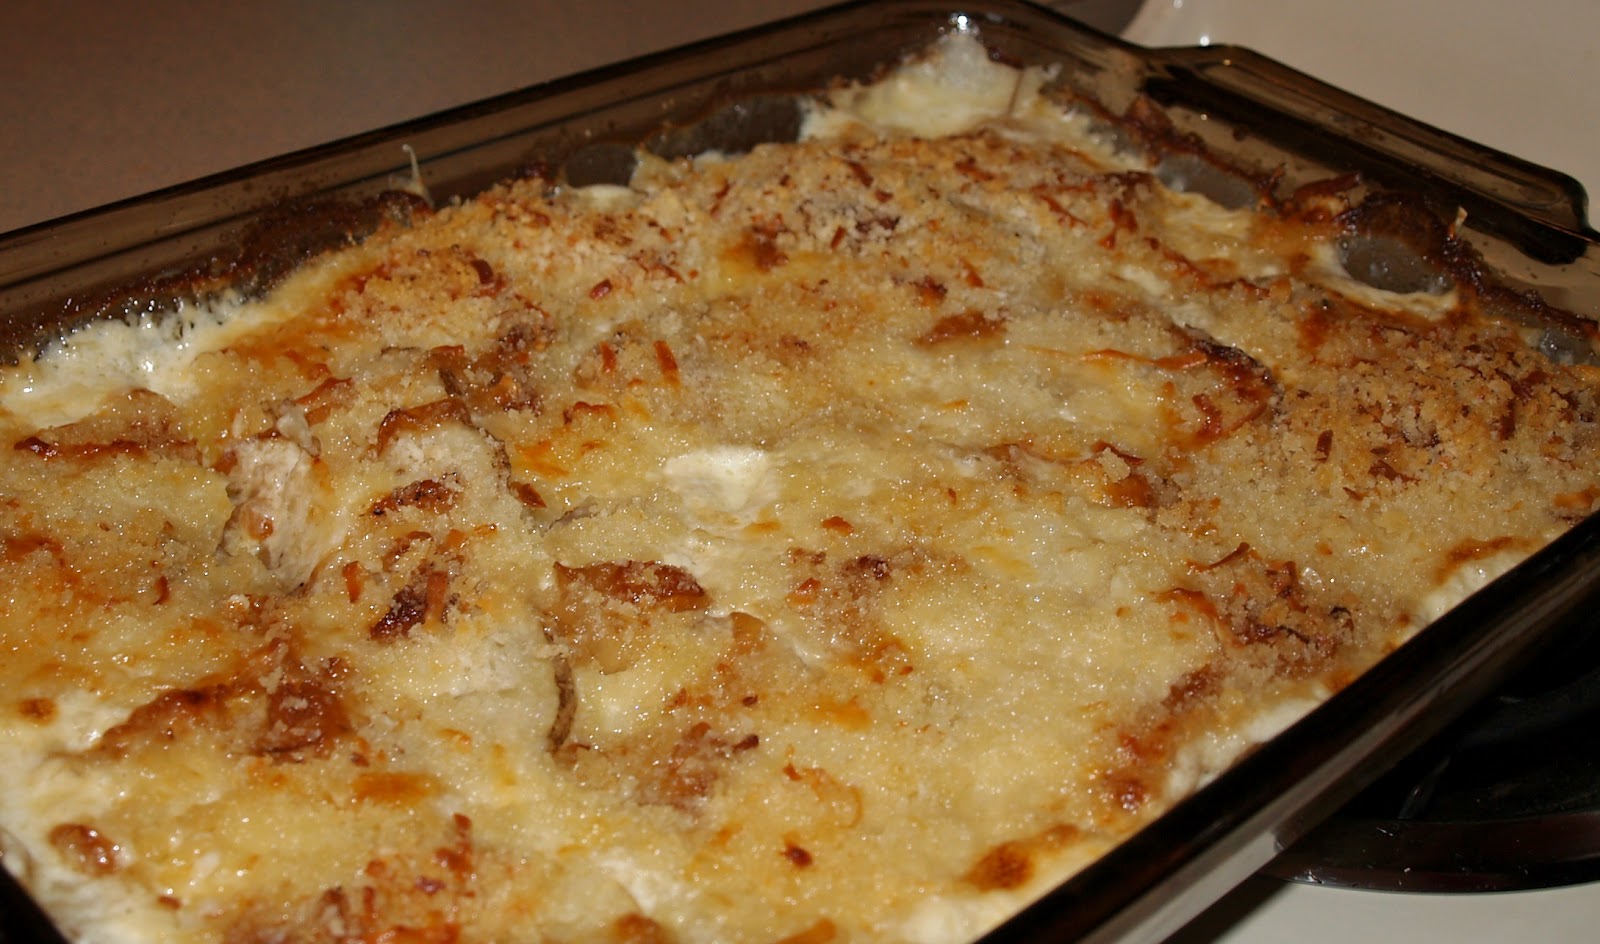
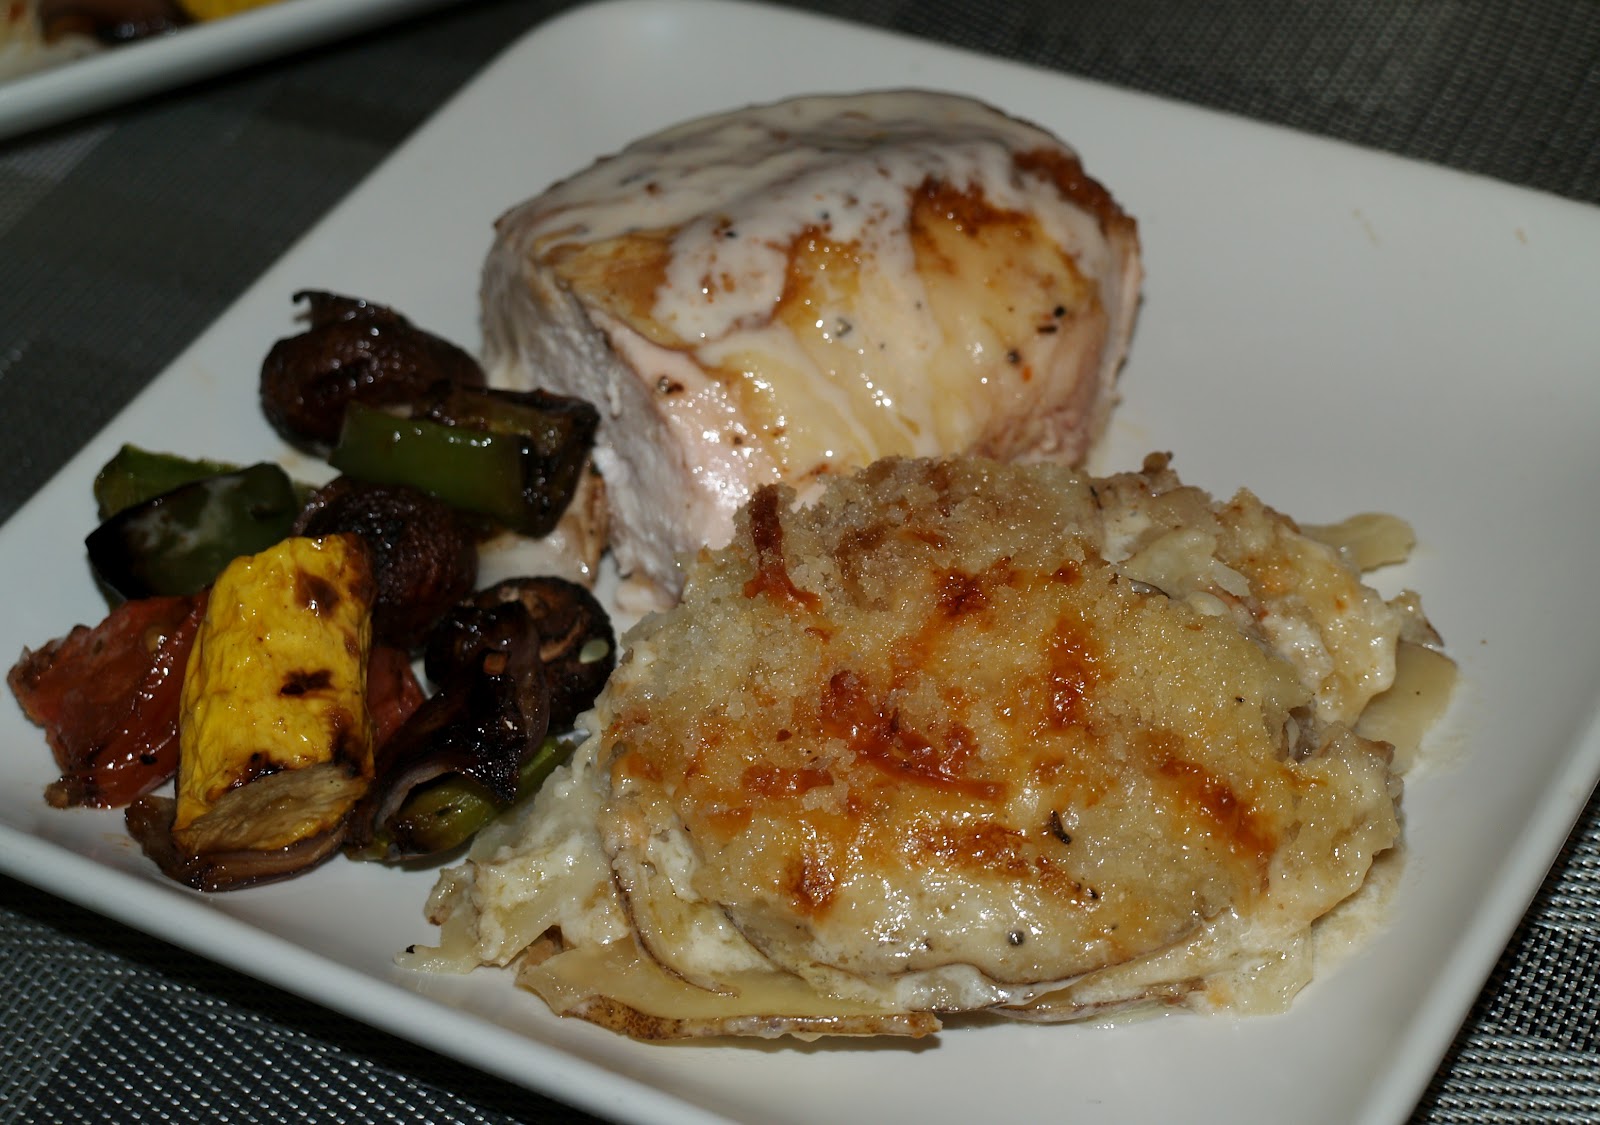
Potatoes Au Gratin with Gruyere and Caramelized Onions


   This dish is pure indulgence! It isn't light or healthy in any way, shape, or form. But, it is utterly delicious! This is strictly for special occasions and it is sure to impress your guests. I made this last Sunday along with Beer-Can Chicken for my birthday dinner. I knew we needed some kind of potato dish, and while my mind was telling me to healthfully roast some potatoes in olive oil, my belly was telling me to smother them in cream and cheese. Of course, as usual, my stomach growled louder than my brain. Happy Birthday to me!


Potatoes Au Gratin with Gruyere and Caramelized Onions

2lbs Russet potatoes
5 sweet onions
3 Tbsp + 1Tbsp butter
olive oil
8oz shredded Gruyere
3 cloves garlic
fresh thyme
2 cups heavy cream
1 cup panko
1/4 cup Parmesan cheese
salt&pepper

For the onions:

Thinly slice onions. Heat 3 tablespoons butter in large skillet over medium heat. Add the onions and season with salt.
Let onions cook for 30 minutes to an hour, stirring occasionally, so they caramelize but don't burn. If they start to get dry, or burn, add a little olive oil to the pan. You can also add a small amount of sugar to help with the caramelization process, but I find this step unnecessary.
Set onions aside. 

For the potatoes:

Preheat oven to 375 degrees.
Place garlic and a few sprigs thyme in a small saucepan with heavy cream. Let simmer.
Slice the potatoes very thin (about 1/8 inch thick). Place a single layer of potato slices in the bottom of a large casserole dish, slightly overlapping. Top with 1/3 of the Gruyere and 1/3 onions. Sprinkle with salt and pepper. Repeat with 2 more layers finishing with Gruyere and onions.
Remove cream from heat and discard herbs and garlic. Pour over potatoes.
Combine panko, Parmesan, and 1 tablespoon melted butter. Spread evenly over top of casserole. Cover with foil and bake at 375 for 45-50 minutes. Uncover and bake until top is golden brown and potatoes are tender.
Let stand 10 minutes before serving.

Enjoy!


Find the recipe for Beer-Can Chicken with White BBQ Sauce here.

Monday, February 13, 2012

Beer-Can Chicken with White BBQ Sauce


   We ate some amazing food this past weekend for my Birthday. Saturday, we ate with a bunch of friends at one of my favorite local restaurants Slice Pizza & Brew . Then Sunday, Brian's family and some friends came over and we cooked out on the grill. We never have cookouts for my birthday because it's always so cold, but we decided to brave the cold this year. Luckily, it warmed up a little in the afternoon and, with the grill and fire pit going, it was pretty comfortable.
   We decided to change it up a little this time and made beer-can chicken, smoked sausage, grilled vegetable kabobs, and potatoes au gratin. Of course, I had to make my FAMOUS white BBQ sauce! It is the easiest thing in the world to throw together and it always gets the most raves from our guests. I have yet to meet a person who doesn't LOVE this sauce. It is traditionally served with chicken, but we serve it with all kinds of BBQ. I'm usually pretty vague about the ingredients in my 'secret sauce' but today I am sharing it with all! So make it and enjoy it!


Beer-Can Chicken

3-4lb whole chicken
Can of light beer
Fresh herbs
Garlic
Spice rub
Olive oil

Make a rub for your chicken. We usually just grab whatever catches our eye from the spice rack. This time we used Lawry's seasoning salt, cayenne pepper, black pepper, Montreal steak seasoning, garlic powder, and onion powder. Feel free to use whatever you like though.
Rub the outside and under the skin of the chicken with olive oil and spice rub.
Pour out (or drink) half of the beer, leaving half in the can. Stuff some whole garlic cloves and fresh herbs into the can. We used thyme and rosemary.
Place the can, right side up, inside the cavity of the chicken. Stand the chicken up using the can as a base to steady the chicken. (You can get metal stands to aid in this, but don't really need one.)
Grill chicken, over direct heat, about 10-15 minutes to get a char on the outside. Then move to indirect heat until temperature reaches 165 degrees. This should take 45-60 minutes depending on the size of the chicken.
Serve with White BBQ Sauce.

    The chicken on the left was basted with a sweet BBQ Beer Sauce during cooking.


White BBQ Sauce
(I always double this recipe, sometimes triple it, and have been known to quadruple it!)

1/2 cup mayonnaise
1/4 cup white vinegar
1/2 tsp horseradish
1/2 tsp salt
1 tsp (or more) black pepper
1 Tbsp brown sugar
pinch of garlic powder
pinch (or more) cayenne pepper,depending on how spicy you want it (I say more!)

Mix all ingredients with a wire whisk. Taste and adjust heat/sweetness. This shouldn't be hot, but a little kick is a must!
Chill for several hours and serve!

Enjoy!


Get recipe for Potatoes Au Gratin with Gruyere and Caramelized Onions here.
Stay tuned for recipes for Smoked Sausage with BBQ Beer Sauce and Balsamic Vegetable Skewers.

Wednesday, February 8, 2012

Ranch Pot Roast

           Pot roast makes me think of my grandma. We used to have a family lunch every Sunday at her house. The whole family would come and we would have, what my cousin refers to as, 'The Feast'. It consisted of roast, creamed potatoes with gravy and a whole smorgasbord of different side dishes. Creamed corn, fried okra, green beans, sweet peas, cornbread, candied yams, and potato salad all made appearances at one time or another. We still have family get togethers on holidays and special occasions, but I will never forget all of those wonderful Sunday dinners growing up in my family.
     This pot roast isn't the feast my grandma would serve, but it is delicious and a lot more reasonable for a weeknight or lazy weekend meal. You can serve this over mashed potatoes, or throw a few quartered red potatoes right in the pot.


Ranch Pot Roast

4-5lb chuck roast
olive oil
4-5 cloves garlic, coarsely chopped
2 onions, halved
16oz bag baby carrots
button mushrooms
rosemary
thyme
1 packet ranch seasoning
2-3 cups beef stock
salt&pepper


Preheat oven to 275 degrees.

  Heat a couple of tablespoons olive oil in a dutch oven over medium high heat. Add onion halves and brown on all sides, remove from pan and set aside. Repeat with carrots.
  Season roast with salt&pepper. If needed, add a little more oil to pan and brown roast on all sides. Add in garlic and cook another minute. Remove roast from pan and deglaze with one cup beef stock, scraping all the little bits of flavor from the bottom of the pan.
   Put roast, onions, carrots, and mushrooms back in the pan, along with a few sprigs of fresh rosemary and thyme.
   Mix ranch seasoning with remaining stock and add to pan, using enough to cover roast half way.
Put lid on and place in 275 degree oven. Leave it for 4-5 hours until roast is cooked through and tender.
   Remove roast from pan and shred using 2 forks. Serve, with vegetables, over mashed potatoes.

Yumm!
 

Saturday, February 4, 2012

Tuscan White Bean Soup with Sausage


        One of the best things about winter is soup. There are so many wonderful soups it's hard to choose a favorite. Okay, not really, chili is definitely the best. But this is a great one! It's warm and comforting, light yet hardy. This recipe came from The Pioneer Woman but I decided to use sausage instead of shrimp. Mostly because it would keep in my fridge longer. This soup would have been even better if it had actually been cold outside when I decided to make it. Instead we were sitting at the kitchen table with the back door open, sweating. Ahhh, winter in Alabama! It was delicious anyway and the whole time I was thinking this could be on the menu at any fabulous Italian restaurant in town.


Tuscan White Bean Soup with Sausage
 (adapted from The Pioneer Woman)
  

5 cloves Garlic, Minced
1 whole Medium Onion, Diced
3 cans (14.5 Ounce) Cans Great Norther Beans, Drained And Rinsed
2 Tablespoons Olive Oil
1 teaspoon Red Pepper Flakes
2 teaspoons Dried Oregano
1/4 cup Tomato Paste
3/4 cups Dry White Wine
1 can (28 Ounces) Whole Or Diced Tomatoes
4-6 cups Low Sodium Chicken Broth
1 bunch Kale (more If Desired)
Plenty Of Torn Fresh Basil
1 Turkey Polka Keilbasa sausage (cooked)
Fresh Parmesan cheese


Heat olive oil in a large pot over medium high heat. Add onions and garlic and stir to cook for 3 to 4 minutes. Add tomato paste and cook about 2 minutes, getting lots of flavor in the bottom of the pan. Stir in red pepper flakes and dried oregano; stir and cook for another 30 seconds.

Pour in wine and stir, scraping the flavors from the bottom of the pan. Cook until reduced by half.
Add canned tomatoes, if using whole tomatoes, break up a bit. Add the drained and rinsed beans. Pour in chicken broth. Stir to combine and allow it to simmer for 20-25 minutes. Season to taste.

Rinse and chop kale and add it to the pot with a bunch of torn basil. The kale will wilt, like spinach, so don't be afraid to add a lot. Simmer 5 more minutes and add any more seasonings if needed.
 
Ladle soup into bowls and top with cooked sausage. Sprinkle Parmesan and additional basil on top. Serve hot.

Yumm!


Thursday, February 2, 2012

Ricotta Stuffed Tomatoes


    This is a great side dish! It's creamy and delicious, but doesn't make you feel heavy. It is also quick and easy to put together. I served this the other night alongside my Creamy Chicken Marsala, but was just as good the next day as a light lunch. I think this would be the perfect summer side dish for a cookout. Oh wow, how good would these be cooked on the grill with a nice juicy ribeye? yumm! I can't wait for the farmer's market this summer. I have so many dishes I would like to recreate once the vegetables are at their best. Or.....how about adding sausage or chicken and making this a main dish? Sorry, I think I'm a little scatterbrained today! Enjoy!


 Ricotta Stuffed Tomatoes
 ( Proud Italian Cook )
2 tomatoes
1 cup part skim ricotta
1/3 cup shredded Parmesan
small bunch chopped fresh basil
small bunch chopped fresh parsley
salt&pepper
panko breadcrumbs for topping
cooking spray

Preheat oven to 400 degrees. Halve tomatoes and scoop out the seeds. Salt the tomatoes and turn upside down on paper towels to draw out moisture.

In a small bowl, mix ricotta, Parmesan, and herbs. Season with salt&pepper to taste. Fill the tomato halves with cheese mixture.

Top each tomato with panko and spray with cooking spray. Bake on 400F for 25 minutes. Let rest for 10 minutes before serving.


yumm!